Are you using WordPress for your blog or website? Would you like to make subscribing to your Cyberimpact mailing list possible for your visitors? If you answered yes to both questions, this tutorial is for you!
There are many ways to connect Cyberimpact to your WordPress website. Choose the option that best suits you, and start growing your email list through your website.
Option 1: Use a hosted subscription form
- Creating your form
- Adding a subscription link to a website page
- Adding a subscription link to the sidebar
Option 2: Use an iFrame subscription form
Option 3: Use an HTML subscription form (expert mode)
Connect Cyberimpact to your WordPresss forms with Zapier
Option 1: Use a hosted subscription form
This is the simplest option because it doesn’t require any technical knowledge. You should use it if you’re looking for a user-friendly, efficient solution that doesn’t require you to know HTML, or you if don’t want to rely on a developer.
Even though I have technical knowledge, I personally really like this option. It’s quick and easy, what’s not to like!
1. Creating your form
In your Cyberimpact account, go to “Configuration” and then “Subscription forms”.
To create a new subscription form, click on “Add a subscription form”.
Fill out all necessary information and select the “Hosted” form type.
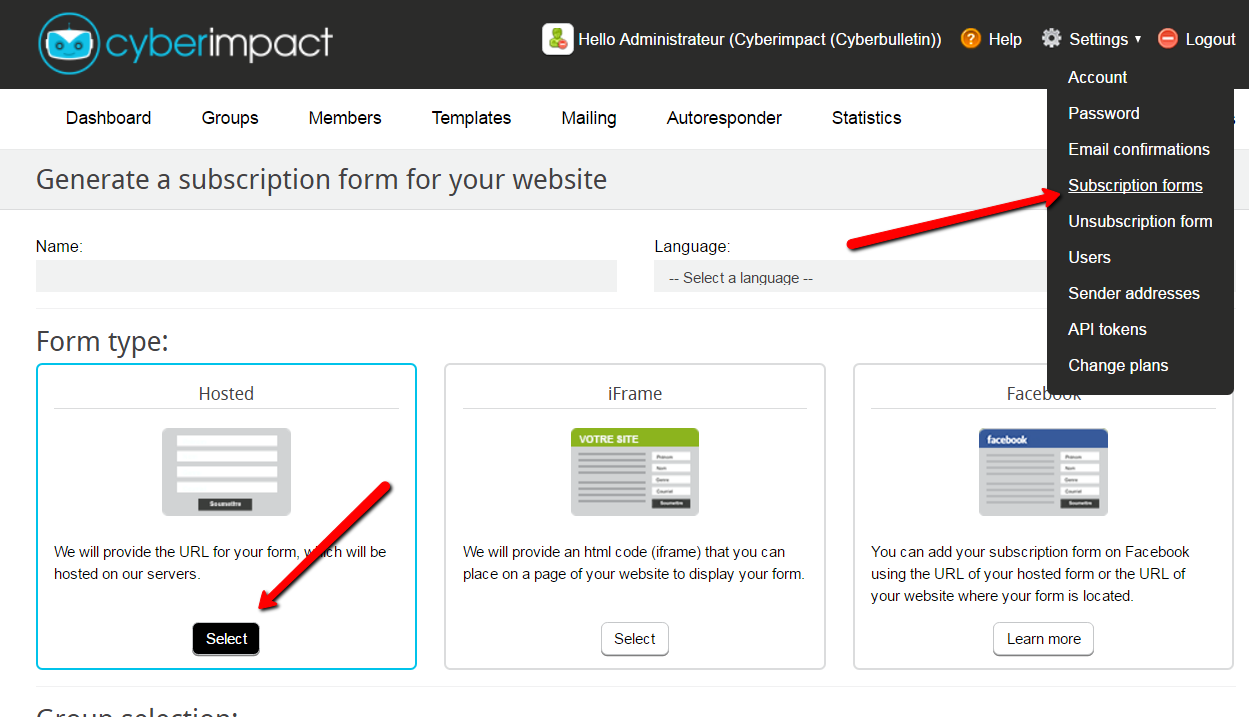
It’s important to select which group you’d like your subscribers to be added to.

The next step will be deciding which fields you’d like to include on your form. At the very least, you need to add the “email” field.
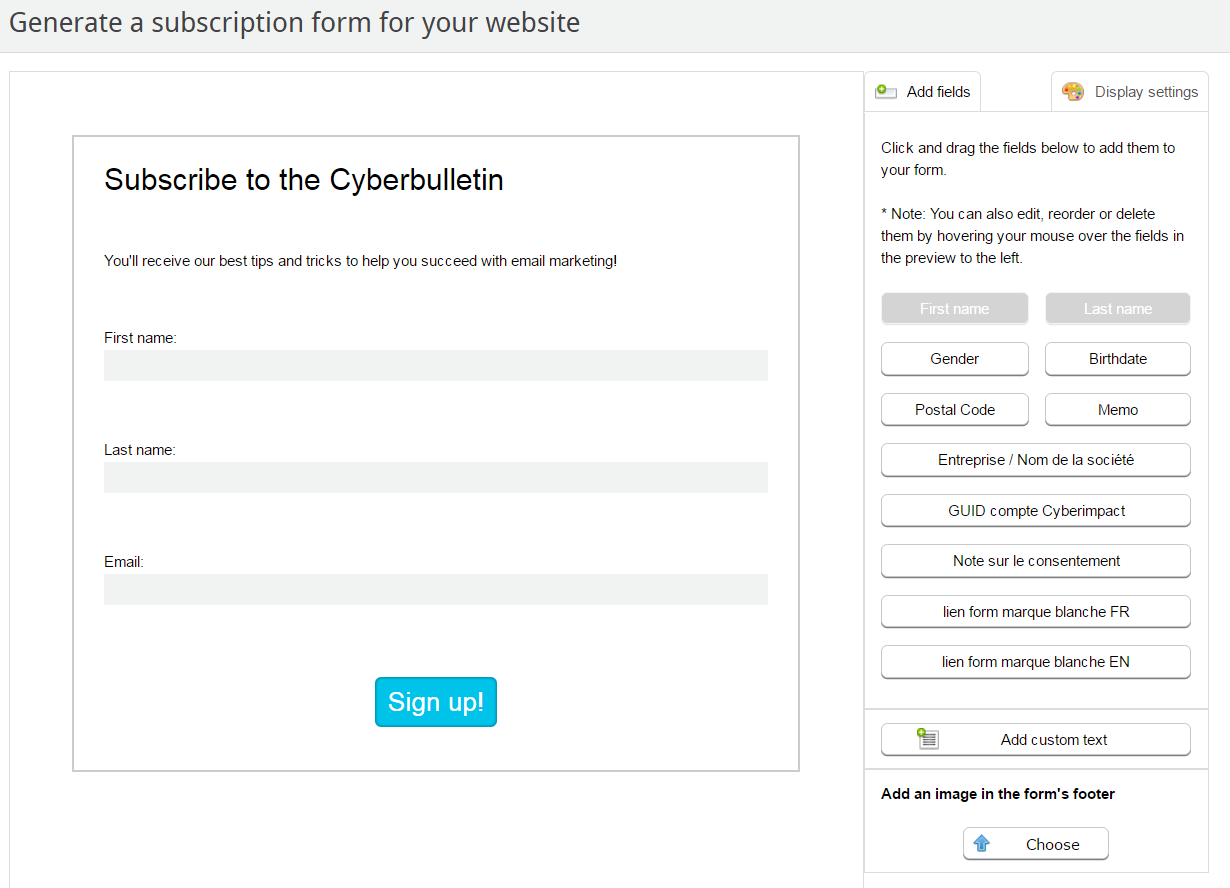
For more details on how to configure your subscription forms, read this tutorial.
When you’re ready, go to the next step.
This last step is optional. Here, you can specify what page of your website your subsribers will be redirected to once they’ve submitted the form.
For example, you could use this option if you wanted new subscribers to download an ebook.
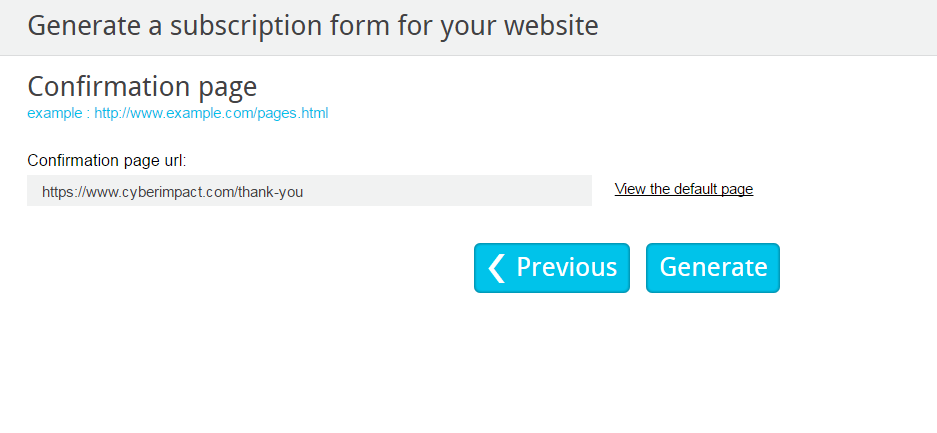
Click “Generate” to complete the creation of your form and the custom URL of your form will appear.
Copy this URL, you’ll need it later.

2. Adding a subscription link to a website page
Log in to your WordPress dashboard, and decide on which page you’d like the link (to your form) to appear. This could be either your homepage, your “about” page, a page dedicated to your newsletter, or any other page you may choose.
On this page, write a convincing blurb that will entice potential subscribers to join your mailing list. Also, come up with a call-to-action, something like “Subscribe” or “Join”. Select the call-to-action, and add the link to it (the link generated in the previous step).
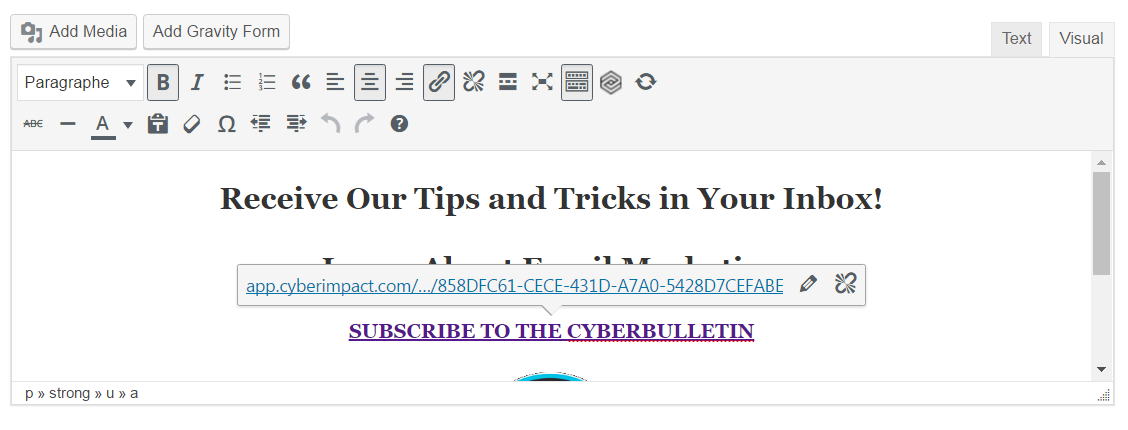
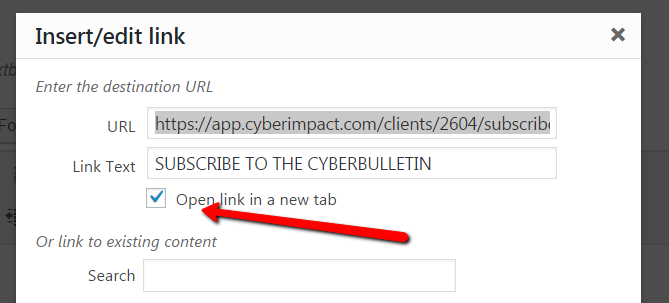
Pro tip: Open the link options (by clicking the gear icon) and check the box “Open link in a new tab”. That way, the hosted form will open in a new tab which means they won’t leave your site completely (which is what you are aiming for).
Below is the subscription link on our About page. It may inspire you!

Then when people click on the link, they are redirected here.
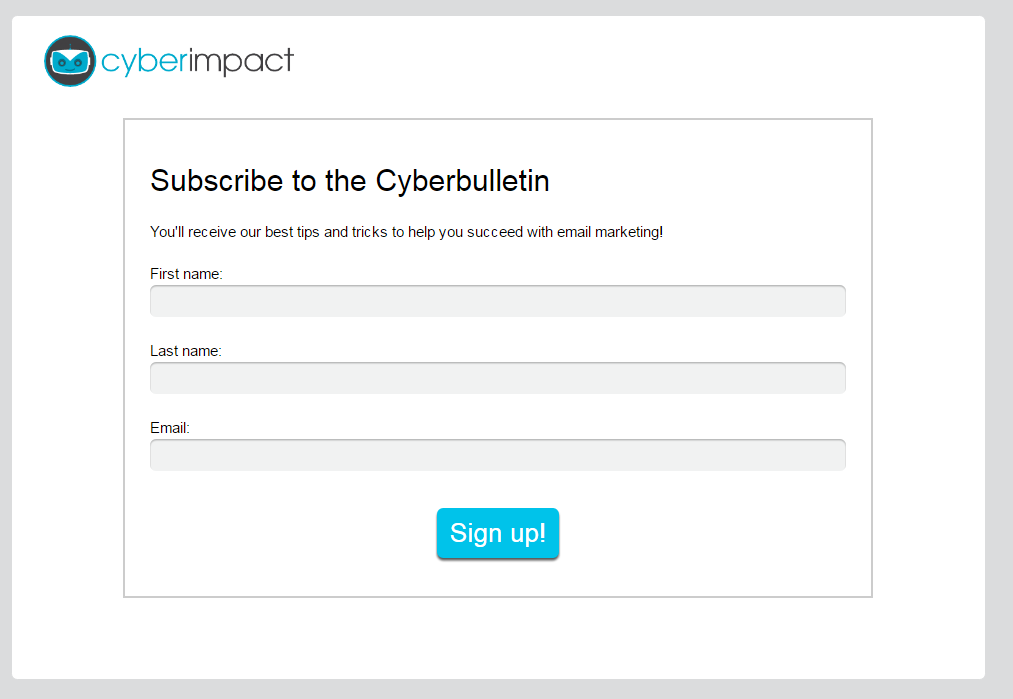
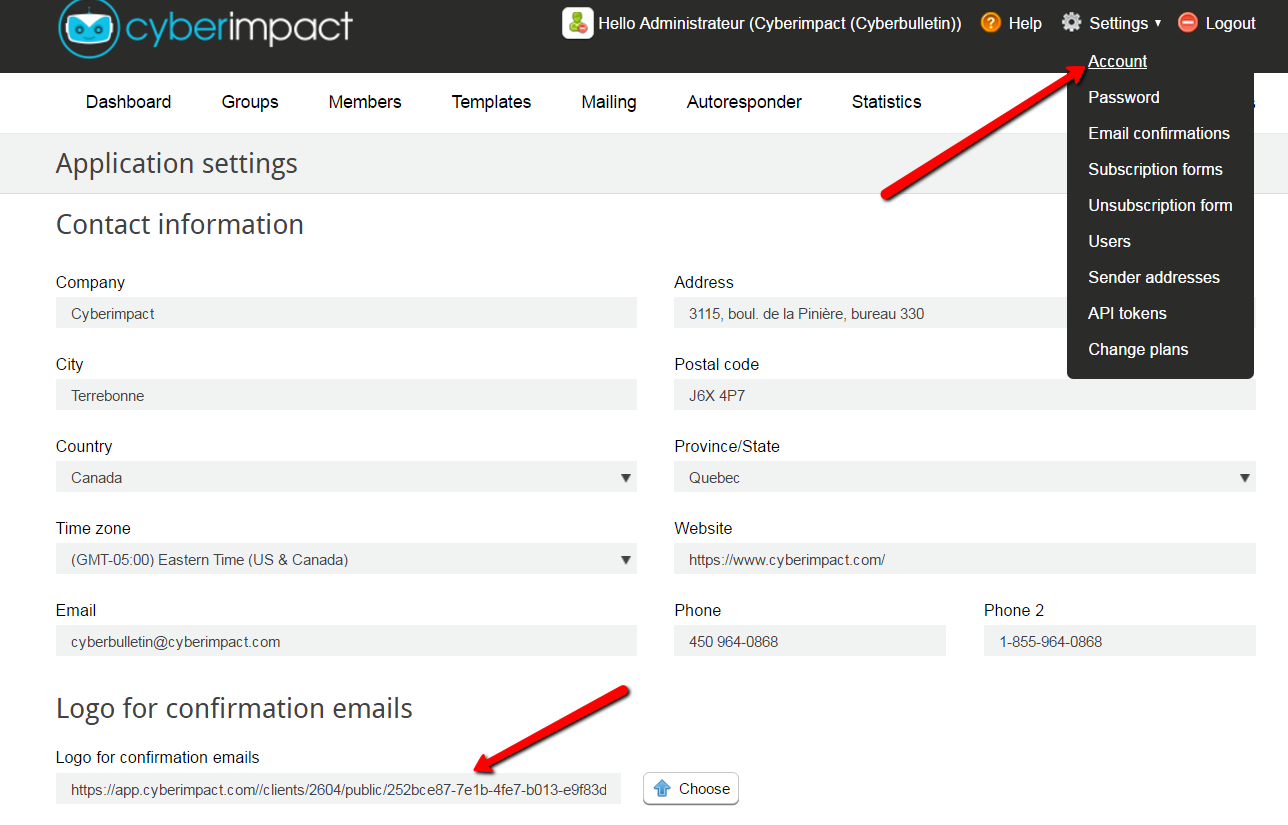
Your logo will automatically appear at the top left corner of your subscription form if you added it in your”account settings”.
3. Adding a subscription link to the sidebar
Most WordPress sites use a “sidebar” that contains “widgets”.
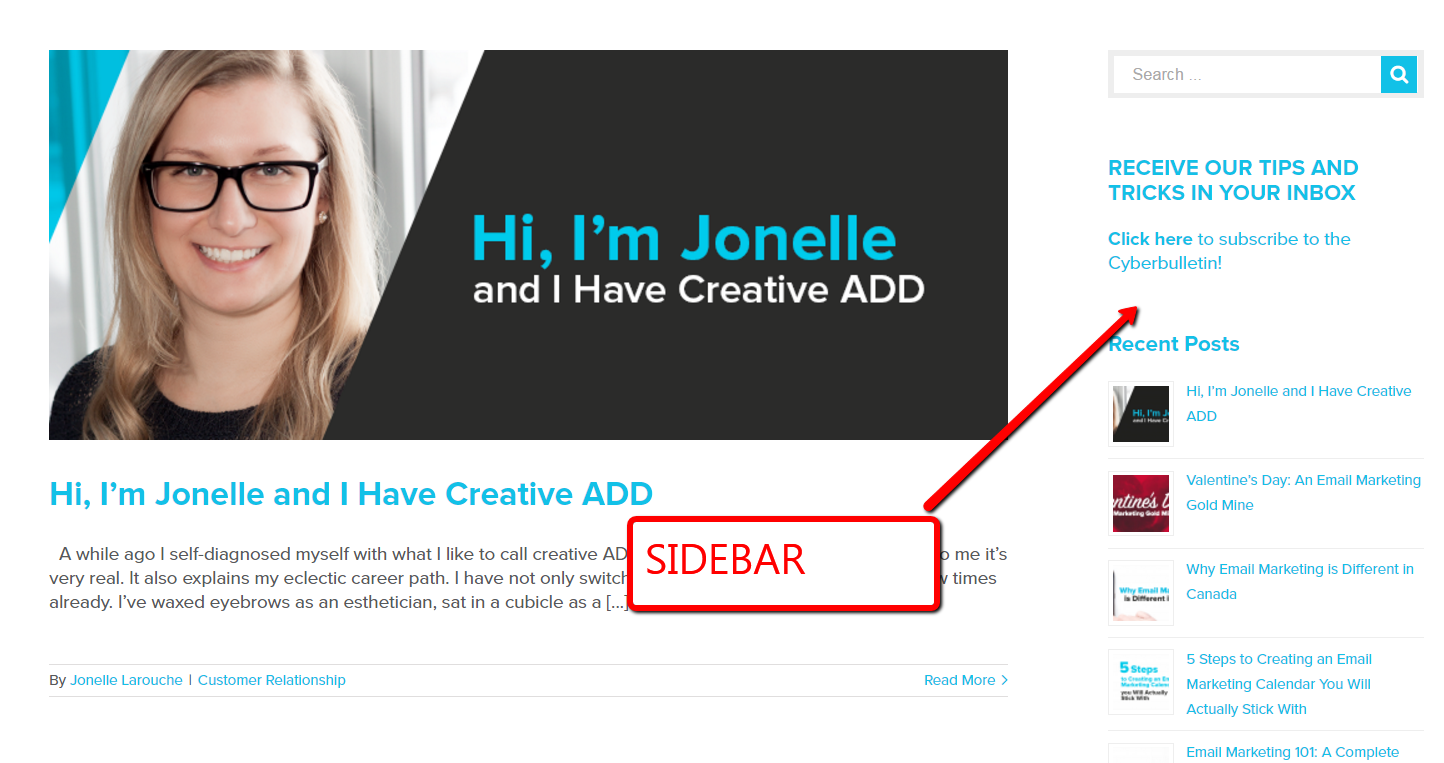
Above, you’ll notice that we’ve added a link to our form on our blog sidebar. Feel free to do the same. If people read your blog articles, they’re most likely interested in your content. Which is why it’s a great place to add a subscription form.
In your WordPress dashboard, got to “Appearance” and “Widgets”. Then add a “Text Widget” to your sidebar.
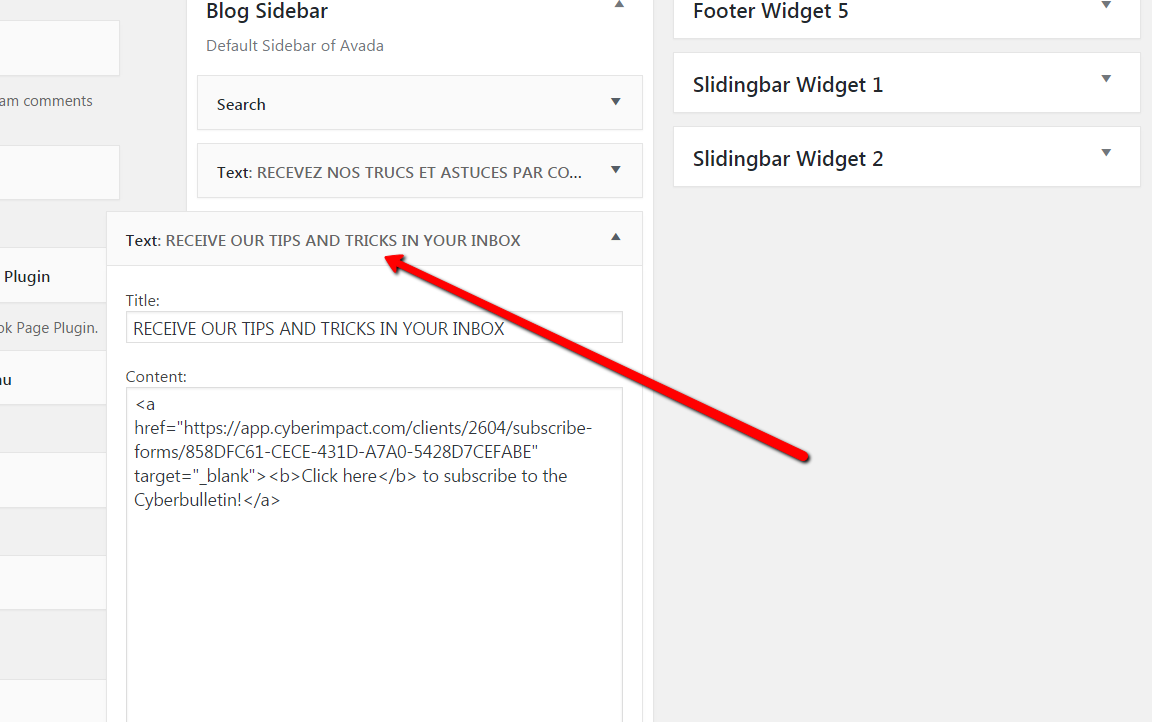
The widget’s title will appear on top of the text and html content. You can use the code below as an example:
Don’t forget to replace https://app.cyberimpact.com/client/2604/subscribe-forms/xxxxxxxx-xxxx with your own form’s link.
Replace the text with what you’d like. What’s between <b> and </b> will be bold.
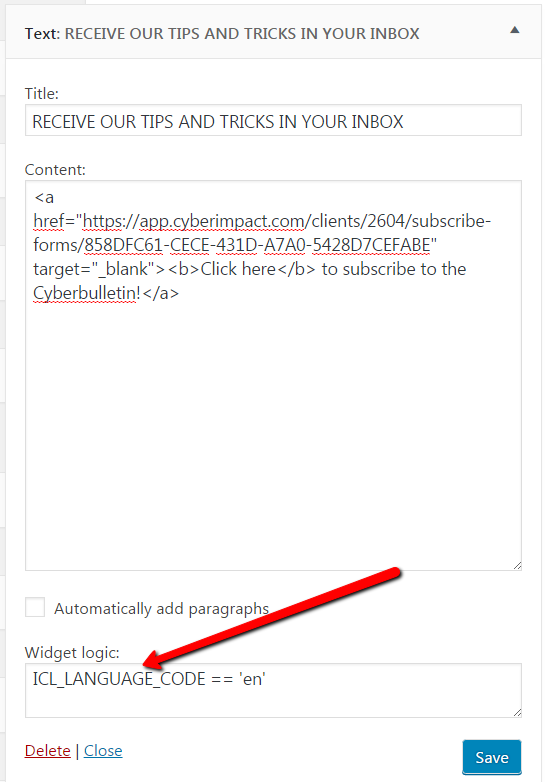
Pro tip: If your website is bilingual, you’ll have to create two separate text widgets, one for each language. Install the Wiget Logic plugin and the display option for your widgets will depend on the language of the page, or article the visitor is on. Here are the conditions you’ll need:
- ICL_LANGUAGE_CODE == ‘en’
- ICL_LANGUAGE_CODE == ‘fr’
This is what it looks like on our blog!
Option 2: Use an iFrame subscription form
If you don’t want your subscription form to be on a page hosted by Cyberimpact, you can use an iFrame, and place it directly into a WordPress page.
1. Creating your form
Create a new subscription form and choose “iFrame” as the form type.
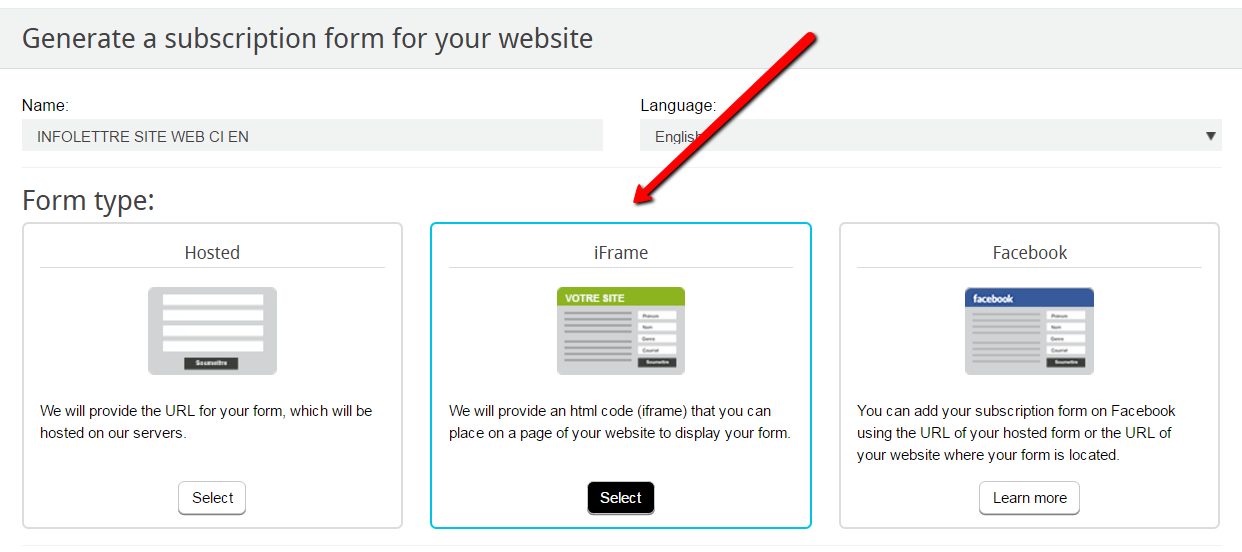
Go through the form creation process as explained above. Again, you can find more details here.
One key detail worth mentioning: At the form configuration stage, you have to specify a width and a height in pixels. My recommendation is to make the form big enough so that there is no scroll bar.
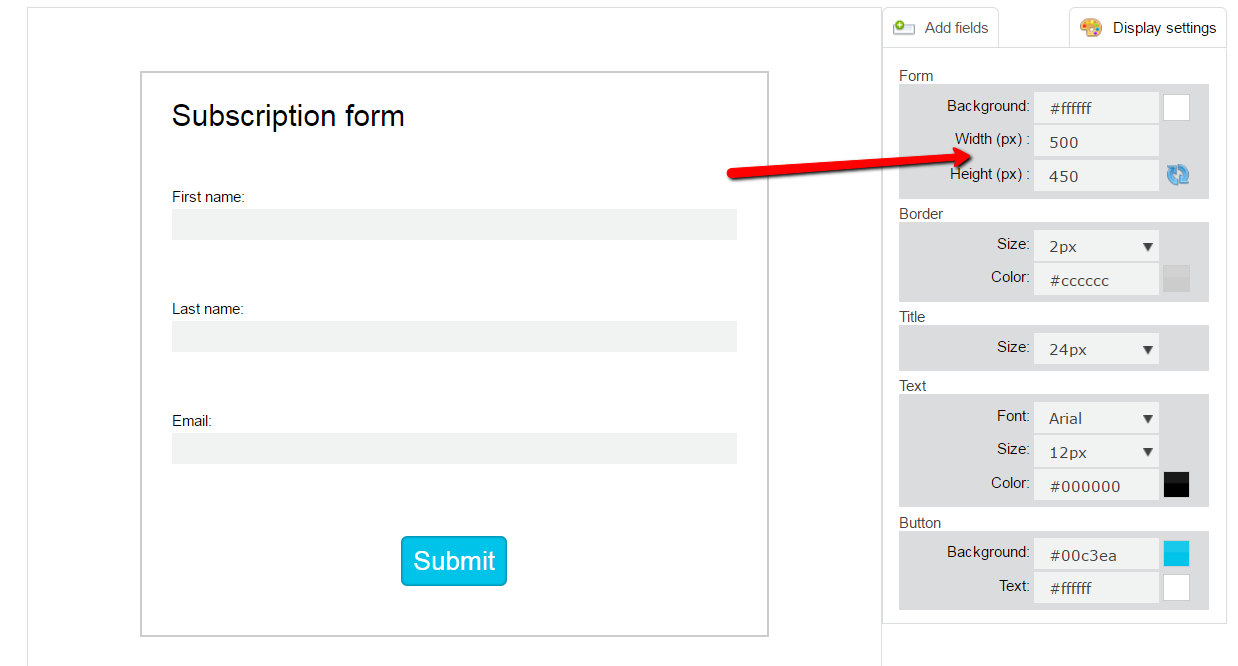
Once you generated your form, you’ll have a code that looks like this:
<iframe src=”https://app.cyberimpact.com/clients/2758/subscribe-forms/xxxxxxxx” width=”500″ height=”450″ frameborder=”0″ marginheight=”0″ marginwidth=”0″ scrolling=”auto”></iframe>
Keep this code handy, we’ll need it for the next step.
2. Adding your form to a website page
In WordPress, simply go to the page where you want your form to be, and paste your code in the content editor while being in “Text” mode.

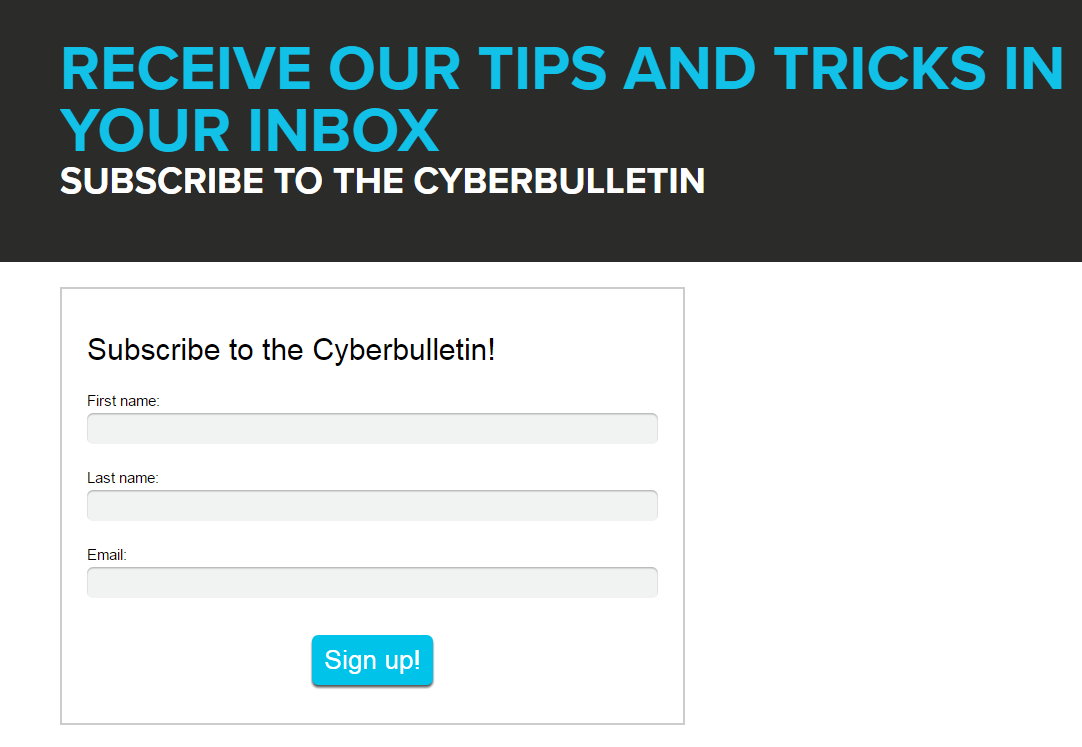
Publish your change and…voilà! Here’s what it looks like on our test page.
Option 3: Use an HTML subscription form (expert mode)
HTML forms give you extra flexibility in terms of design. But you need to have some technical skills (or a friend that knows HTML) in order to use them.
That being said, if you have access to a programmer who can help you (or if you are one yourself), there are no limits to custmizing HTML forms.
It’s important to note that our customer service department can’t help you with styling those forms.
1. Creating your form
Here’s a tutorial that explains how to create HTML forms, and here’s the form creation tool.
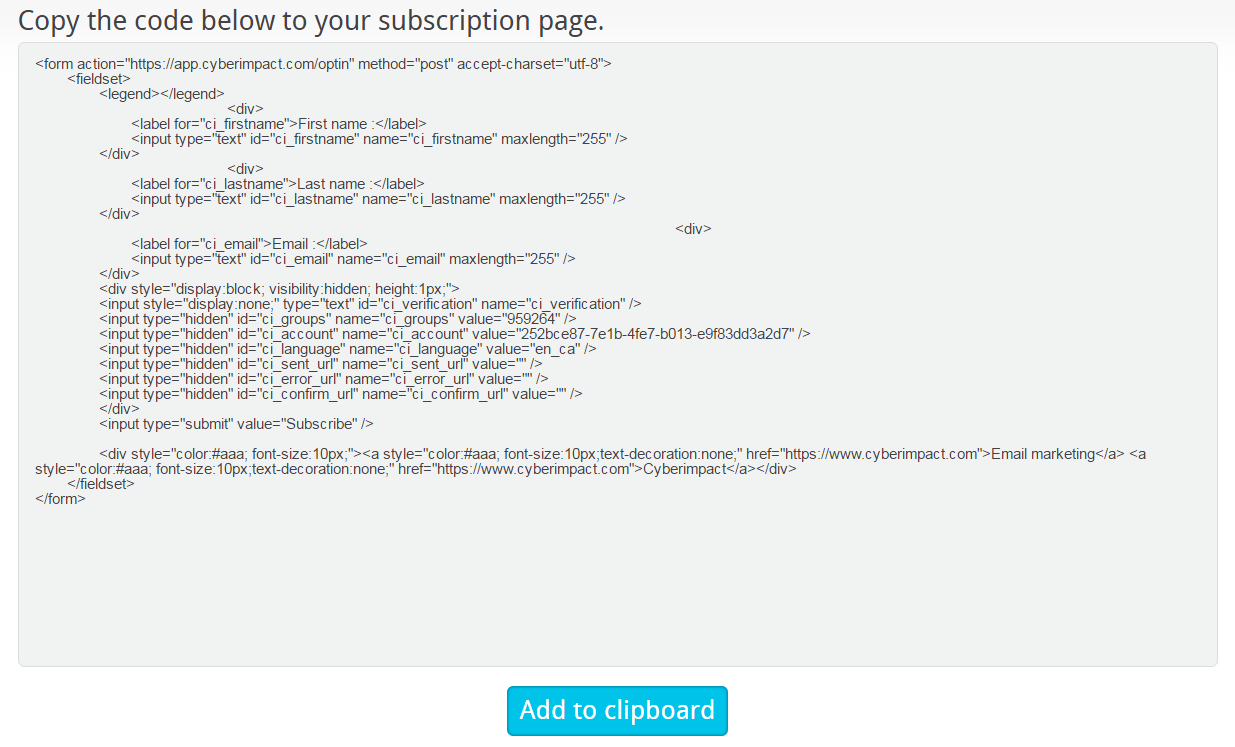
Once your form is created, you’ll have a code like this one:
2. Adding your form to a website page
In WordPress, simply go to the page where you want your form to be featured and paste your code in the content editor while being in “Text” mode.
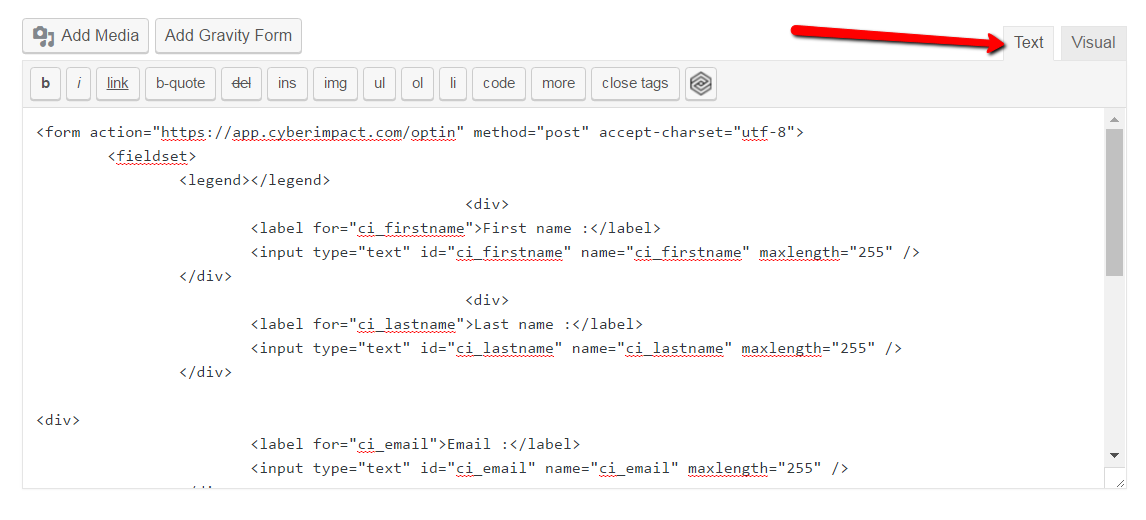
If you don’t modify the code, it might not look that great. But again, this HTML form is 100% customizable.
Option 4: Connect Cyberimpact to your WordPresss forms with Zapier
Do you know what Zapier is? It’s a connecting platform that allows you to connect different apps together. And Cyberimpact is compatible with Zapier!
To my knowledge (at the moment of writing this tutorial), there are two popular WordPress form plugins compatible with Zapier, Gravity Forms and Ninja Forms.
For the sake of this demo, I’ll use Ninja Forms. The procedure would be pretty similar if you want to use Gravity Forms.
Important: To complete this integration, the API function needs to be activated in your Cyberimpact account. To activate the function, send us a request by email at the following address: support@cyberimpact.com. The request must come from either the technical or billing contact of your account. Don’t forget to include your business and/or account name in your request.
Just like HTML forms, this option requires some technical knowledge. Therefore only advanced users should use it. Our customer service department can not help you with an integration such is this one. That being said, follow the steps below and it should work just fine!
1. Creating your form and adding it to a page
Obviously, your WordPress form plugin needs to be installed and active on your site. Then, create a form containing at the very least, an email field.

Here’s a tutorial on how to create a form with Ninja Forms, and another for Gravity Forms.
2. Creating the Zapier integration
Note that Zapier itself is free (for this integration) but platforms, sush as Ninja Forms and Gravity Forms, require a paid extension to work with Zapier. It’s usually not very expensive, the Ninja Forms Zapier extension costs $49 USD. Once this extension is installed and activated, you’re all set!
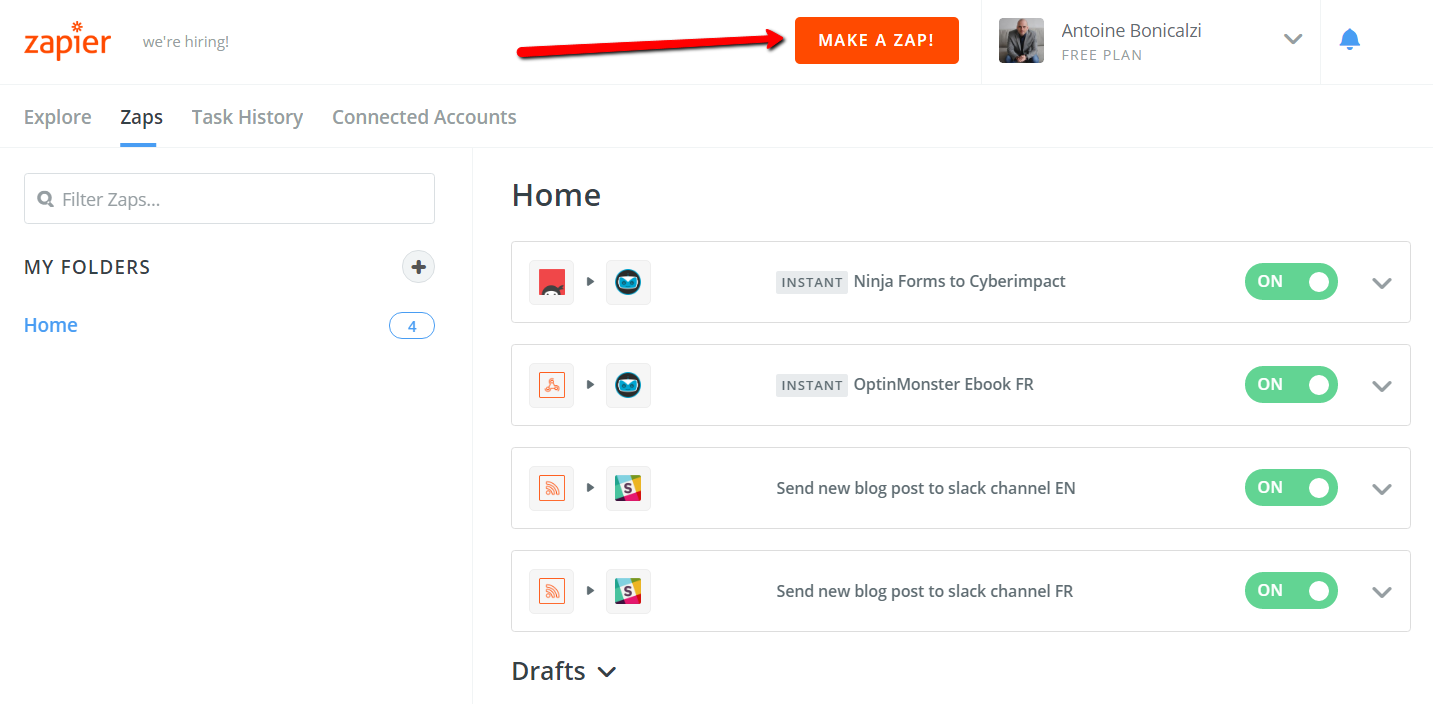
Login to Zapier and click on “MAKE A ZAP”.
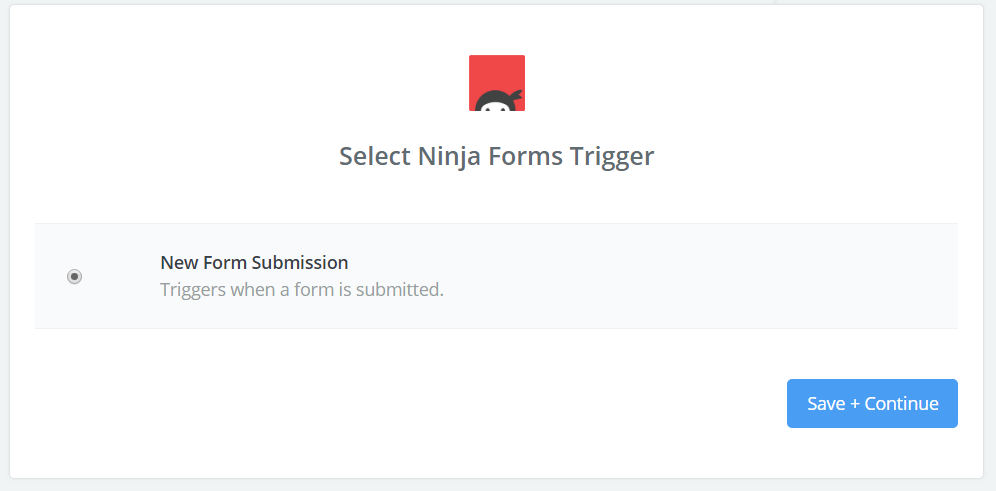
The first step is to select the app that will be the trigger. In our case, the app is Ninja Forms and the trigger is “New Form Submission”.
Then, copy the WebHook URL that Zapier provides.
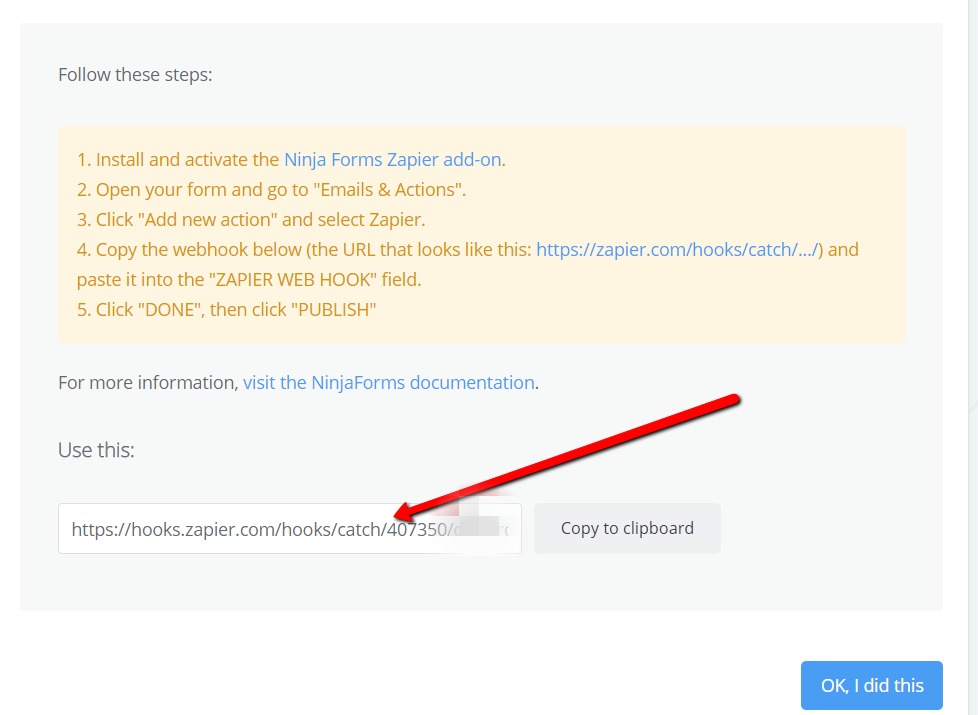
Go to the “Emails and Actions” option on your form, add the Zapier action and paste the WebHook URL.

Don’t forget to save your form!
Click “OK, I did this” (in Zapier) to go to the next step. Zapier will now run a test (that should be successful), to find the form.
Half the work is already done! Now, let’s configure the app that will perform the action in the integration. In our case, Cyberimpact.
Choose Cyberimpact as the “Action App” and select “Add a new member” as the action.
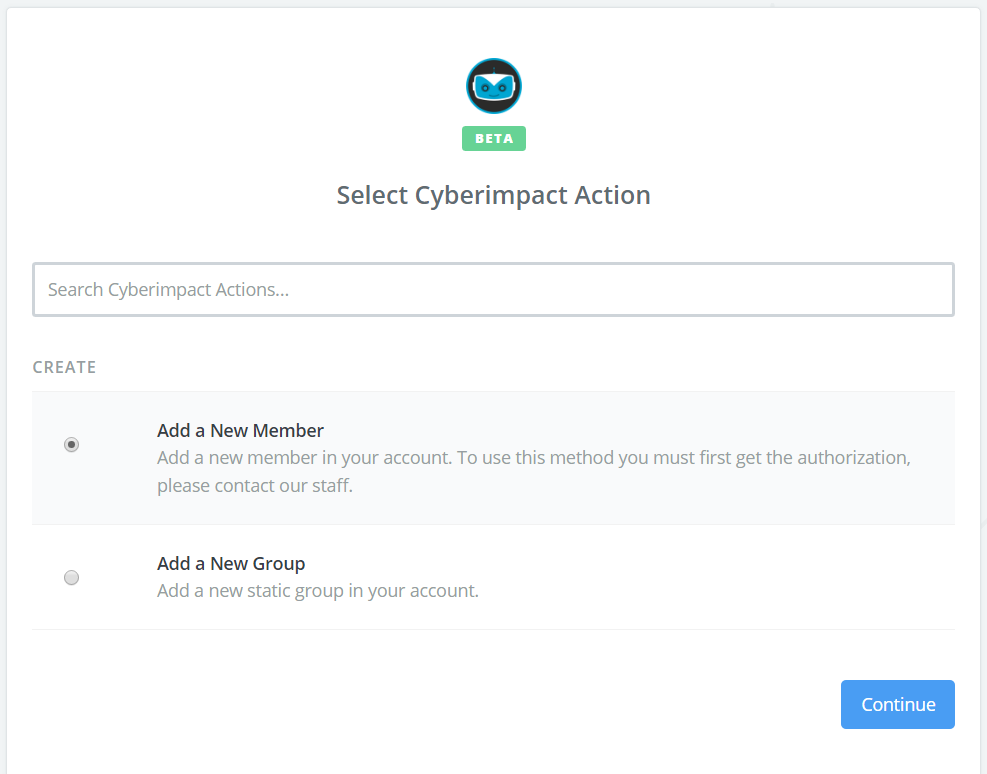
At the next step, you need to connect your Cyberimpact account to Zapier. Click on “Connect a New Account”.
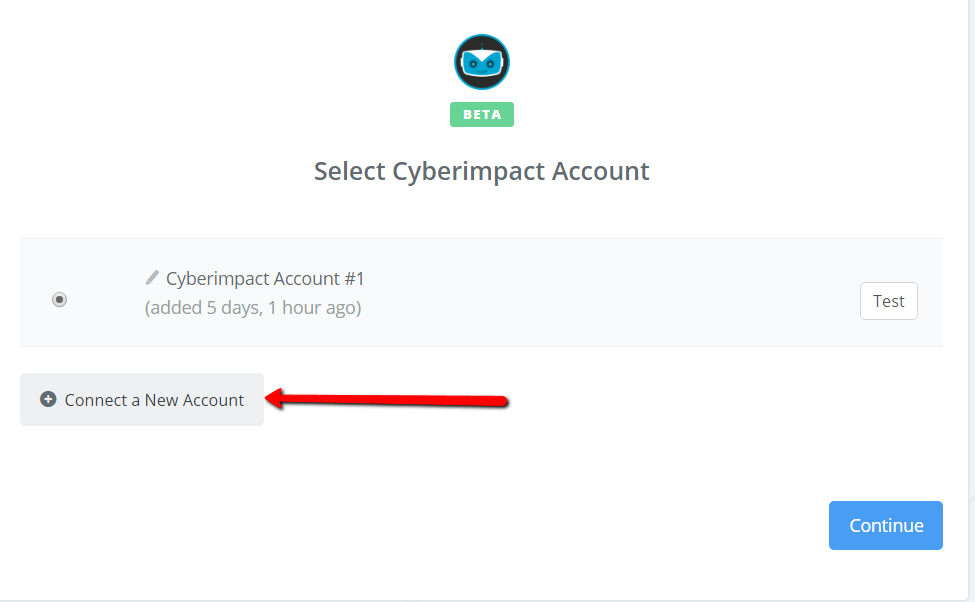
And this window will appear.
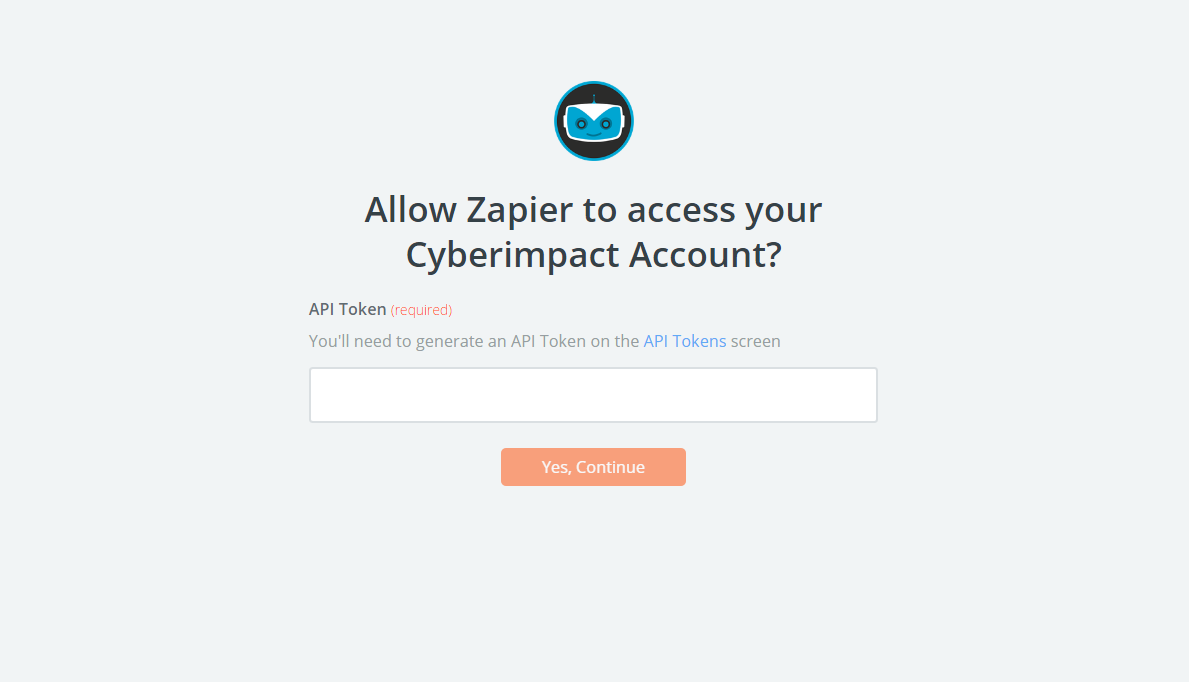
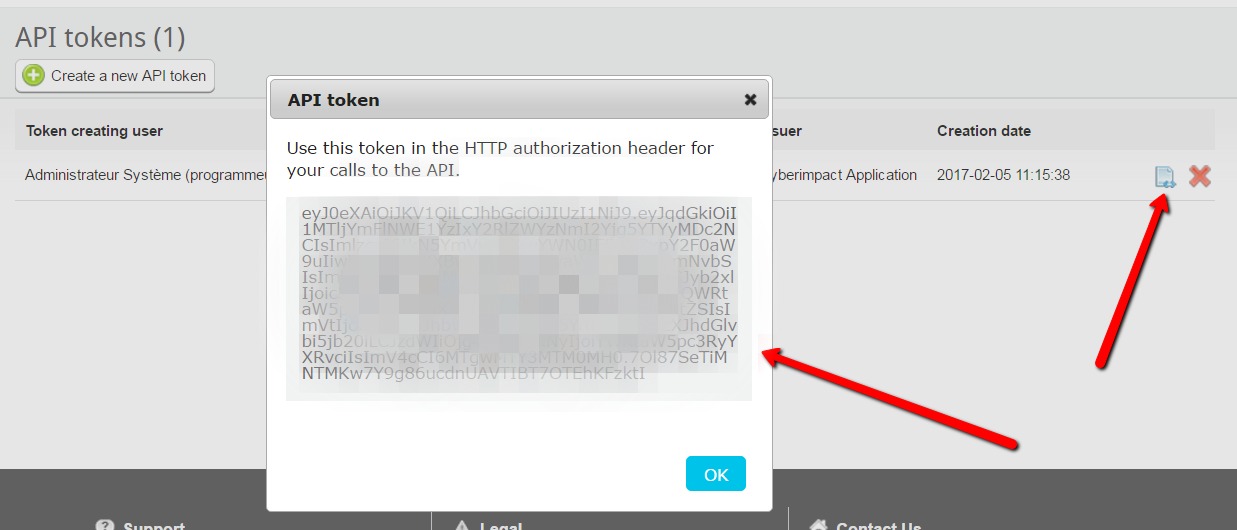
You now need to paste your Cyberimpact API token. To find it, go to https://app.cyberimpact.com/config/api-tokens and click on “Create a new API token.

Then, click on the code icon and copy the whole thing.
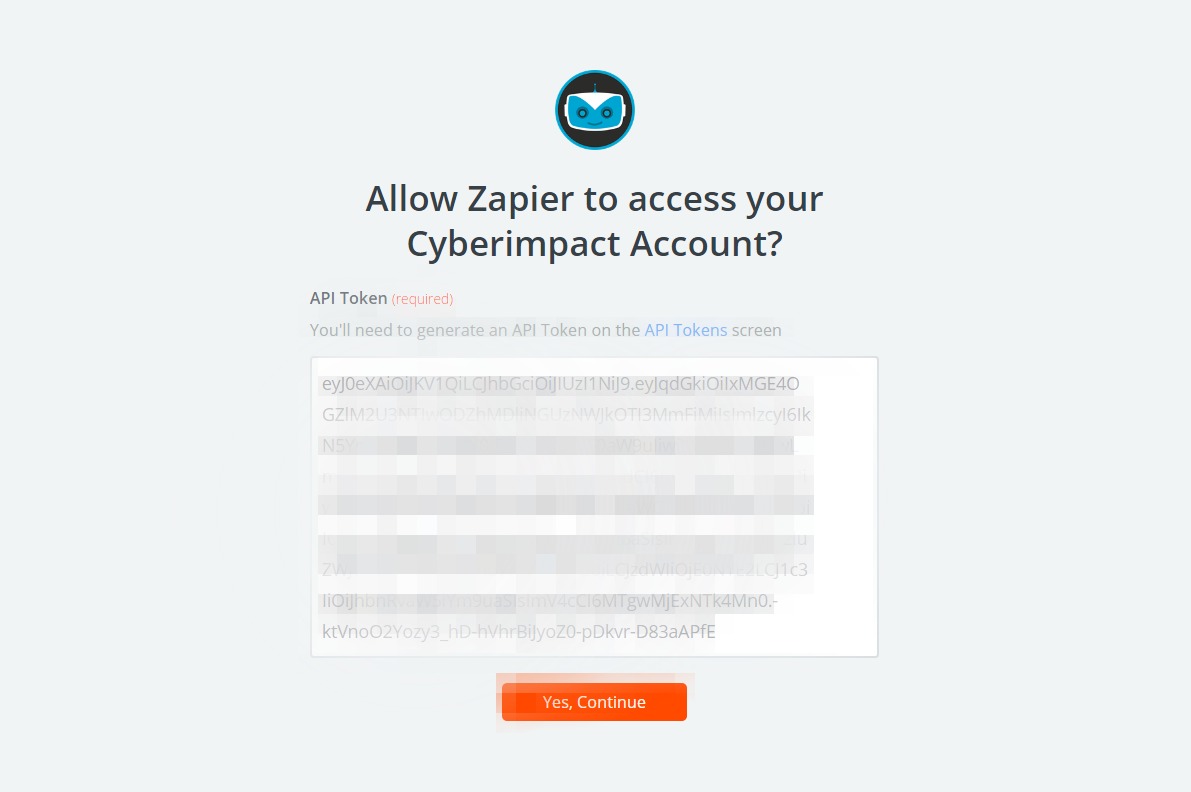
Paste the API token into the Zapier window and click on “Yes, Continue”.
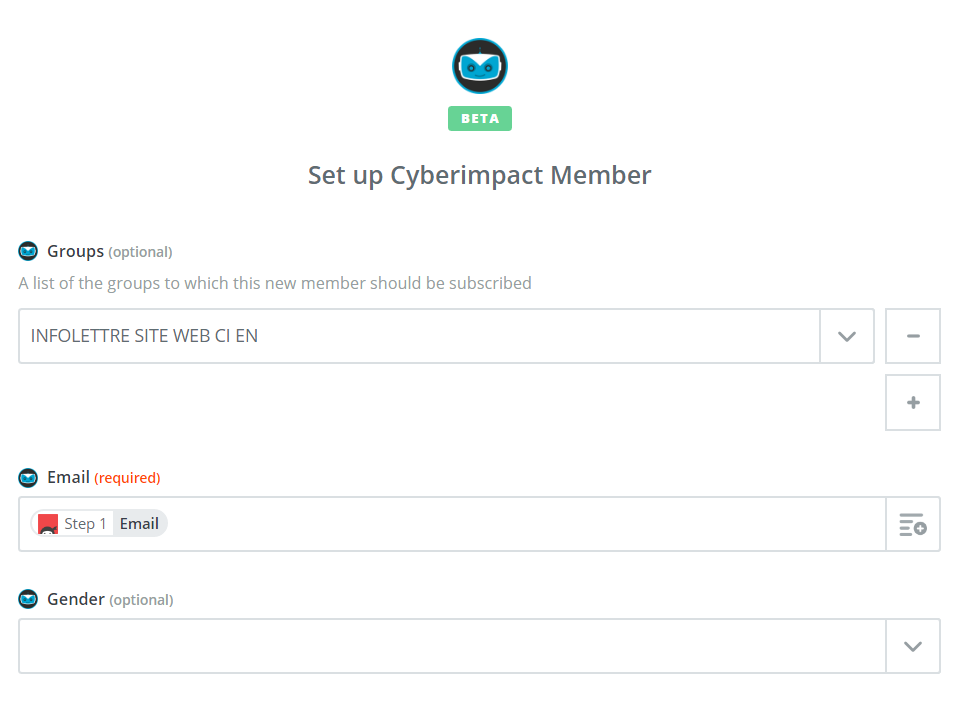
Go to the “Edit Template” step in Zapier. You’ll then specify to which Cyberimpact group your new subscribers will be added to once they fill out your form.
This is also where you’ll map the form fields to the Cyberimpact fields. Only the “email” field is necessary.
Finally, turn the Zap on!
3. Testing your integration
I strongly recommend testing the integration. You can simply fill out the form on your site and provide a test email address.
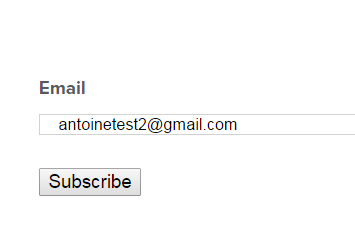
You should then see that email address in you Cyberimpact account under the right group.

And that’s it! Congrats, you’ve integrated Cyberimpact with your WordPress site!
If you need any additional help, or have questions, click here to contact us.

